
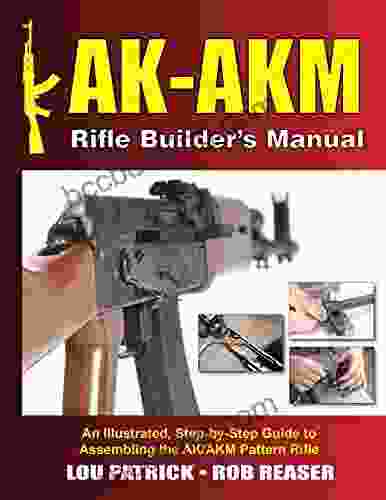
An Illustrated Step By Step Guide To Assembling The Ak Akm Pattern Rifle

The AK/AKM pattern rifle is one of the most popular and widely used firearms in the world. It is a simple, reliable, and effective weapon that has been used in countless conflicts around the globe.
4.8 out of 5
| Language | : | English |
| File size | : | 27985 KB |
| Text-to-Speech | : | Enabled |
| Enhanced typesetting | : | Enabled |
| Word Wise | : | Enabled |
| Print length | : | 122 pages |
| Lending | : | Enabled |
| Screen Reader | : | Supported |
This guide will provide you with all the information you need to assemble your own AK/AKM pattern rifle. We will cover everything from the basics of the AK platform to the assembly of the various components.
What You Will Need
Before you begin, you will need to gather the following tools and materials:
* An AK/AKM pattern rifle kit * A set of punches * A hammer * A screwdriver * A torque wrench * Loctite * CLP
Step 1: Prepare The Receiver
The first step is to prepare the receiver. This involves removing the trigger guard and the pistol grip.
To remove the trigger guard, simply use a punch to push out the pin that holds it in place.
To remove the pistol grip, use a screwdriver to remove the screw that holds it in place.
Once the trigger guard and pistol grip have been removed, you can begin to assemble the rifle.
Step 2: Install The Barrel
The next step is to install the barrel. To do this, simply insert the barrel into the receiver and hand-tighten the barrel nut.
Once the barrel nut is hand-tightened, use a torque wrench to tighten it to the proper torque specification.
Step 3: Install The Gas Block
The next step is to install the gas block. To do this, simply slide the gas block onto the barrel and hand-tighten the gas block screws.
Once the gas block screws are hand-tightened, use a torque wrench to tighten them to the proper torque specification.
Step 4: Install The Handguard
The next step is to install the handguard. To do this, simply slide the handguard onto the barrel and hand-tighten the handguard screws.
Once the handguard screws are hand-tightened, use a torque wrench to tighten them to the proper torque specification.
Step 5: Install The Gas Tube
The next step is to install the gas tube. To do this, simply insert the gas tube into the gas block and hand-tighten the gas tube nut.
Once the gas tube nut is hand-tightened, use a torque wrench to tighten it to the proper torque specification.
Step 6: Install The Bolt Carrier Group
The next step is to install the bolt carrier group. To do this, simply insert the bolt carrier group into the receiver and hand-tighten the bolt carrier group screw.
Once the bolt carrier group screw is hand-tightened, use a torque wrench to tighten it to the proper torque specification.
Step 7: Install The Charging Handle
The next step is to install the charging handle. To do this, simply insert the charging handle into the bolt carrier group and hand-tighten the charging handle nut.
Once the charging handle nut is hand-tightened, use a torque wrench to tighten it to the proper torque specification.
Step 8: Install The Trigger
The next step is to install the trigger. To do this, simply insert the trigger into the receiver and hand-tighten the trigger screw.
Once the trigger screw is hand-tightened, use a torque wrench to tighten it to the proper torque specification.
Step 9: Install The Hammer
The next step is to install the hammer. To do this, simply insert the hammer into the receiver and hand-tighten the hammer screw.
Once the hammer screw is hand-tightened, use a torque wrench to tighten it to the proper torque specification.
Step 10: Install The Safety Selector
The next step is to install the safety selector. To do this, simply insert the safety selector into the receiver and hand-tighten the safety selector screw.
Once the safety selector screw is hand-tightened, use a torque wrench to tighten it to the proper torque specification.
Step 11: Install The Buttstock
The next step is to install the buttstock. To do this, simply insert the buttstock into the receiver and hand-tighten the buttstock screw.
Once the buttstock screw is hand-tightened, use a torque wrench to tighten it to the proper torque specification.
Step 12: Install The Magazine
The final step is to install the magazine. To do this, simply insert the magazine into the magazine well.
Once the magazine is inserted, your AK/AKM pattern rifle is now complete.
Assembling an AK/AKM pattern rifle is a relatively simple process. By following the steps outlined in this guide, you can easily build your own rifle.
If you have any questions or concerns, please feel free to contact me. I am always happy to help.
4.8 out of 5
| Language | : | English |
| File size | : | 27985 KB |
| Text-to-Speech | : | Enabled |
| Enhanced typesetting | : | Enabled |
| Word Wise | : | Enabled |
| Print length | : | 122 pages |
| Lending | : | Enabled |
| Screen Reader | : | Supported |
Do you want to contribute by writing guest posts on this blog?
Please contact us and send us a resume of previous articles that you have written.
 Book
Book Novel
Novel Page
Page Chapter
 Text
Text Story
Story Genre
Genre Reader
 Library
 Paperback
 E-book
 Magazine
 Newspaper
 Paragraph
 Sentence
 Bookmark
 Shelf
Shelf Glossary
 Bibliography
 Foreword
 Preface
 Synopsis
 Annotation
 Footnote
 Manuscript
 Scroll
 Codex
Codex Tome
Tome Bestseller
 Classics
 Library card
 Narrative
 Biography
 Autobiography
 Memoir
 Reference
 Encyclopedia
 Vladimir London
 Thomas Stewart
 Steven Harrison
 Suzanne Simard
 Renee Rose
 Jonathan Robinson
 Jerry Duberstein
 Thomas Nast
 Susan Nance
 Wil Mara
 Grace Burrowes
 Lex Croucher
 Susan Mcelroy Montanari
 Lucinda Fleeson
 Steven Pinker
 Vijaypat Singhania
 Van Lu
 Richard D Wolff
 T E Bakutis
 Shing Schih
Light bulbAdvertise smarter! Our strategic ad space ensures maximum exposure. Reserve your spot today!


 Scott ParkerUncover the Thrilling Tale of 'Married To Down South Don': A Gripping Memoir...


 Brian BellFollow ·19.6k
 Darrell PowellFollow ·7.5k
 Geoffrey BlairFollow ·18.8k
 Christian CarterFollow ·5.3k
 Banana YoshimotoFollow ·3.9k
 David PetersonFollow ·10.1k
 Hugh BellFollow ·10k
 Cody BlairFollow ·4.8k

 Amir Simmons
Immerse Yourself in the Enchanting Realm of Nora Roberts'...
Prepare to be captivated by...

 Dan Henderson
Unleash the Explosive Action of Going Ballistic Combined...
Prepare for an...

 Jeffery Bell
Discover the Controversial and Captivating "The Anarchist...
In the realm of literature, there are...

 Ryan Foster
Unveiling Lincoln's Eloquence: How His Greatest Speeches...
In the annals of American...

 Steven Hayes
 Jaime Mitchell
Love Radio Vinny Berry: A Journey of Heartbreak, Healing,...
Vinny Berry's...
4.8 out of 5
| Language | : | English |
| File size | : | 27985 KB |
| Text-to-Speech | : | Enabled |
| Enhanced typesetting | : | Enabled |
| Word Wise | : | Enabled |
| Print length | : | 122 pages |
| Lending | : | Enabled |
| Screen Reader | : | Supported |
